顯示具有 gateau 標籤的文章。 顯示所有文章

2014年7月13日 星期日

Madeleine 法式小蛋糕


這幾天天氣不太好,巴黎經常下雨,加上我突然皮膚敏感弄得我整個面都很多紅點,求醫的過程十分艱巨,令我很沮喪,詳情不談了,不過看了醫生情況已經大大受控,人在異鄉最重要還是身體健康。應一位朋友在fan page 的要求加上我都很想吃法式小蛋糕,所以今天在家做了Madeleine。

Medeleine 的故事是這樣的,有一個失權的波蘭王帝被放逐到Lorraine ,有一天他吃過晚飯後,他發現沒有甜點吃,但他十分堅持要吃甜點,放是他的吩咐僕人去做。有一個小女僕做了一個貝殼形的蛋糕給他吃,國王看到後十分高興。他問小女僕這個蛋糕叫甚麼。女僕說這個蛋糕沒有名字,但她家鄉的人每到節日時就會做這個蛋糕。國王再問小女僕的名字是甚麼。大家都估到她叫medeleine ,而國王以後就叫這個蛋糕做medeleine. 由於國王很喜歡medeleine,他送了很多給他的女兒,而他的女兒是路易十五的妻子,medeleine就由凡爾賽宮一直流傳到現在。一個好的medeline 應該有圓圓的突肚臍,就像貝殼上的珍珠一樣那樣搶眼。

除了這個故事外,madeleine 在文學也有一個小小的位置。法國的文學作家Marcel Proust 在他的著作- 追憶似水年華中也常常提到法式小蛋糕。他說法式小蛋糕加上熱茶熟識的氣味,勾起自己兒時的回憶,他在現實及記憶之間他尋找昔日的自己,而Madeleine 亦可以謂開拓了他日後寫作道路的一扇門。

回到現實,以下是Madeleine  的食譜:

可以做8個 Madeleine

(將以下材料 x1.5 可以做12個)

材料:
  • 砂糖 40g
  • 蜜糖 10ml
  • 雞蛋 1個
  • 牛奶 20ml
  • 牛油 60g
  • 麵粉 60g
  • baking powder 3g 
  • 檸檬皮 一個
  • vanilla extract 一茶匙 / 香草條半條
  • 另備牛油及麵粉掃模


1. 在鍋溶牛油,牛油要保持黃色,不要煮牛油至啡色。(如果火很猛,先離火再等半分鐘再翻熱,這個動作可以on and off 做)


2. 待牛油全溶後,離火,加入牛奶混合。


3. 另外備一個大碗,加入雞蛋,vanilla extract/ 香草籽,砂糖先攪混,加入蜜糖後再攪。

4. 麵粉加入baking powder 混合。


5. 將4. 加入3. 混合,用打蛋器攪混。


6. 加入牛油牛奶,即2,攪混。
7. 最後,加入檸檬皮伴勻。(由於物資短缺,沒有下檸檬皮,但強烈建議放)


8. 放入雪櫃冷藏一小時,最理想冷藏一晚。


9. madeleine 模掃上牛油(室温),放上大量麵粉覆蓋,倒出多餘的麵粉。


10. 取出麵糊,入唧袋,在模內唧上麵糊,每個大概3/4,不要填太滿。
11. 放入170度的焗爐約10分鐘。

* 一定要用牛油及麵粉掃模,否則不能成功脫膜,牛油不要太硬,否則掃不開,也不要牛油液。掃上牛油後可以放回雪櫃冷藏一分鐘令牛油凍一點再倒上麵粉。

*一定要倒很多麵粉,之後可以在工作枱鋪一張牛油紙,將多餘的麵粉沿貝殼直線方向倒出,一定要將多餘的倒出,可以用刮刀/木棍輕拍模的底部幫你去除多餘的,只剩薄薄一層,多餘的麵粉倒回你裝麵粉的盒重用。

*混合的過程不要太用力,要盡量輕力,否則就做不到突肚臍。

* 用silicone 模可以不用牛油及麵粉掃模,但silicone 模沒有鐵模的傳熱及穏定性好,不過沒有鐡模都沒有太大關係,最重要是麵糊做得好不好。

2014年6月30日 星期一

lemon cake 檸檬牛油蛋糕 (沒有泡打粉)


自從上了藍帶的牛油蛋糕課後,改變了我對牛油蛋糕的看法,chef 果然不是浪虛得名!這個蛋糕很moist ,一定要趁熱吃,配一杯熱茶感覺一定很滿足! 做法非常簡單,相同份量的雞蛋,砂糖,牛油同麵粉,加少少檸檬皮/ 橙皮就可以做到! 沒有泡打粉,不需要攪拌機,只要一大碗,一個打蛋器,一個磅就可以!

1個

材料: 
雞蛋 2隻 (110g) 
牛油(室温) 110g (另外加少許掃模) 
麵粉 110g (模:另外加少許) 
砂糖 110g ( 信我,不會很甜,因爲我都怕甜)
檸檬皮 / 橙皮 少許

做法:


1. 首先,將110g牛油攪拌至軟身,不須要變淺白色,不需要很多力,攪至很creamy就可以。

2. 加入砂糖再攪拌均混。


3. 一次過加入雞蛋及檸檬皮攪拌,可能有少許分離的情況,但是正常的。


4. 加入110g麵粉再攪至麵糊混合好沒有粉粒就可以停止。
5. 用軟牛油掃模身,倒入麵粉在模內,在模中搖幾下令所有邊都沾到麵粉,倒出多餘麵粉,模內應該只有一層薄薄的麵粉。做這個動作方便脫模。將麵糊倒入模內。

6. 放入預熱160度的焗爐焗35-45分鐘。

* 只要攪拌就可以,不須要過度打發。
* 要用砂糖才可以做出外面鬆脆的效果。
* 不須要用刀在蛋糕中間介一刀,做對的話,蛋糕會自動爆裂。
* 我今次沒有做第5個步驟,因爲我以爲我這個新的made in france不沾模可以不做,但還是有點黏,所以建議不要跳過。
* 如果吃不完,蛋糕冷卻後,用保鮮紙包住,放入密實盒,可以keep 一個星期,不過當然最好盡快享用好! 


2014年5月8日 星期四

Raspberry and rose medeleines 紅桑莓玫瑰瑪德蓮


我喜歡在蛋糕中加入酸的水果,不但因爲可以平衡甜味,而且酸味可以令蛋糕的味道更加立體,好像看電影或聽音樂中的聽到的環迴立體聲由左耳到達右耳的感覺,我知這個比喻有點誇張,但對我來說大概就是這個意思。

由於有紅桑莓剩下,所以繼續ispahan 主題,參考這個食譜 。以下份量可以做4個,由於我剛剩下半隻雞蛋,又不想用多半隻做8個,用1隻半又做太多,所以只做4個,建議可以雙倍以下份量做8個。

材料:
  • 砂糖 20g
  • glucose 5g (glucose 可以令蛋糕保濕效果更好,如果沒有可以用粟膠或蜜糖代替都有相同的效果)
  • 低筋麵粉 32g
  • 蛋 半隻
  • baking powder 1g
  • 牛奶 5ml
  • vanillia extract 1/2 茶匙
  • rose essence 1-2g (如沒有可以skip)
  • clarified butter 41g
  • 紅桑莓 3-4粒 


1. 先將砂糖,蛋,glucose 用打蛋器混合,混合就可以,不用跟平時做海棉蛋糕般打發成又稠又白的蛋漿。
2. 低筋麵粉加入baking powder混合過篩,分兩次加入蛋漿拌勻。
3. 逐一加入牛奶,vanillia extract,rose essence 混合。


4. 最後加入clarified butter混合 。clarified butter 的做法是先將牛油切小塊或粒,放在小鍋中以最小的火加熱,不要攪拌,一直煮至所有牛油成爲液體,期間有白色泡沬浮面,這層就是乳清,將所有泡沬隔走, 之後產生的泡沬會減少,一直隔走直至沒有泡沬再浮起。一直煮會發現牛油的固體物會沉甸成啡黑色的物質,而上面的液體就是butter fat ,牛油在這個時間會發出獨特堅果風味。完成後就可以熄火,用篩隔走多餘的雜質就成了clarifed butter 。最後加入紅桑莓粒混合。


5. 放雪櫃一晚,但至少要一個小時,做出來的medeleine 才會有肚臍-中間凸出的效果。
6. 第二天取出,放室温回温,在模掃上牛油再撒上麵粉,將多餘的麵粉篩走,做薄薄的一層,將麵糊唧在模上,每個模唧約2/3份量,以200度焗11-15分鐘或直至金黃色。
7. 放涼數分鐘脫模享用。

* clarified butter,中文澄清牛油,法文beurre noisette, 市面上有clarified butter 售賣,但價格比較貴,自己在家都可以做到clarified butter。clarified butter 是透過加熱牛油令牛油中的水份及乳清蒸發 ,只剩下butter fat 。clarified butter 可以令蛋糕做到更鬆酥的效果及獨特堅果風味,而且存放時間更長,冒煙點較高。除了做medeline, 曲奇之外,原來印度人都喜歡用ghee 就是clarified butter 做咖喱,蔥油餅等等。做clarified butter 的過程會有損耗,原食譜要求32g 的clarfied butter ,我就用多一點的牛油去做。

2014年4月25日 星期五

Crunch cake 焦糖脆脆天使蛋糕


星期五總是令人快樂的,放工後可以做自己喜歡的事。星期五做蛋糕令我良心比較過意得去,因爲即使做晚了吃多了,我總會告訴自己我星期六日都可以做運動消耗。但事實是多數都沒有實行,因爲做得很累就更想睡多一點,不過偶爾偷懶一下都可以吧?

材料: 約5.5"

雪芳蛋糕

蛋黃麵糊

  • 蛋黃 2個 
  • 植物油 10ml 
  • 低筋麵粉 40g (已篩) 
  • 砂糖 10g 
  • 牛奶 30g 
  • Vanillia extract 1 茶匙
蛋白霜

  • 蛋白 2個 
  •  砂糖23 g 
 裝飾
  • 鮮忌廉 200g 
  • 砂糖 10g 
焦糖脆脆
  • 砂糖 50g 
  • 粟膠 12g 
  • 水 12g 
  • 梳打粉 1/2茶匙
蛋黃麵糊做法:


1. 蛋黃,砂糖,vanailla extract及油用打蛋器混合,不用打發到變白色,只須混合。
2. 牛奶及低筋麵粉分兩次交錯加入蛋黃糊中混合 。


蛋白霜做法:
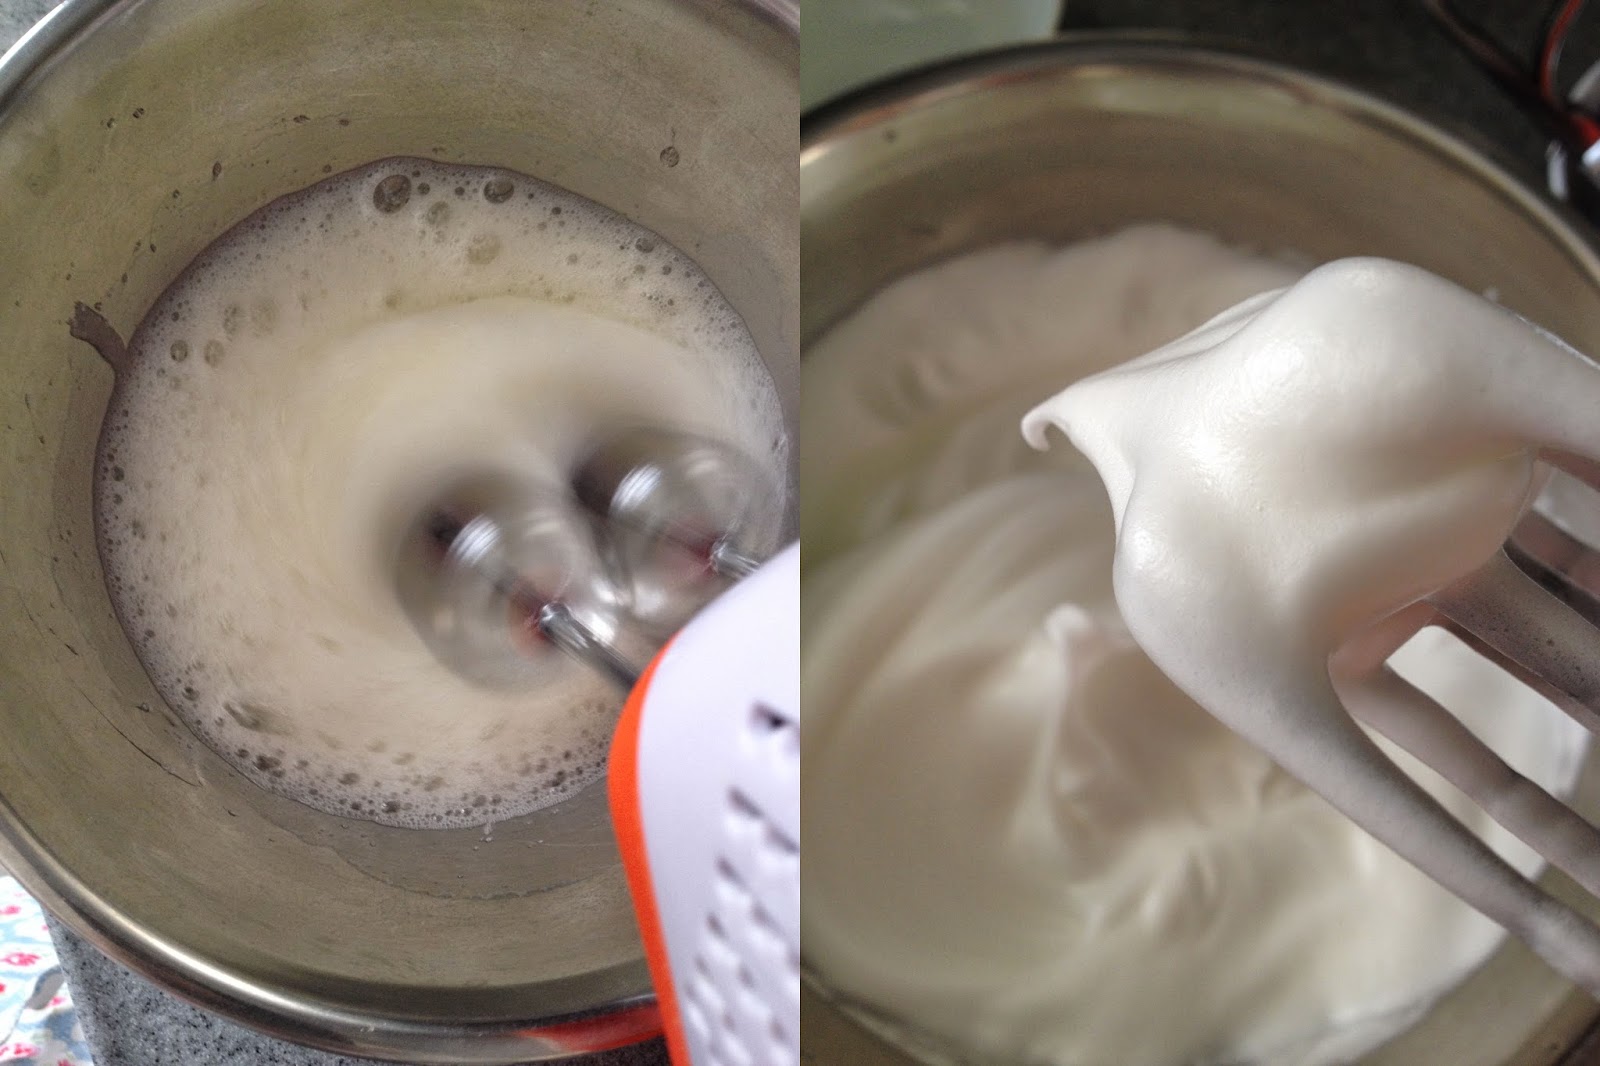
1. 蛋白用電動攪拌器打至出現泡沫,砂糖分兩次加入打發,打至蛋白霜挺立。 


混合做法:
1. 預熱焗爐150度15分鐘。
2.將三分一的蛋白霜加入蛋黃麵糊,用輕力攪勻,用打圈再向中間劃的方法混合,再分兩次加入餘下的蛋白霜。
3.倒入戚風蛋糕模中,倒至6-7分滿,入焗爐前敲蛋糕模幾下,令麵糊中的較大的氣泡敲出。
4.入焗爐焗40 分鐘,出爐後馬上倒扣,待涼約2小時後用手沿著蛋糕模的邊脫模(用手掌肉沿蛋糕邊壓令蛋糕從模分開,內邊同樣重覆,底部向上推,最後只剩下蛋糕底部黏住模,同樣用手掌肉輕壓一圈,就可以成功脫模)。

焦糖脆脆做法:


1. 將砂糖,粟膠及水在小鍋中拌勻。
2. 用中火煮糖水至金黃色(如圖)離火。糖水的顏色由最初的透明到淺黃色到金黃色,期間不要搞混,要有需要可以用布隔住拿起小鍋輕搖幾下以確保焦糖的色澤均勻一致。煮糖水時要眼雙不離,如果糖水煮至太深黃色,焦糖就會產生苦燶味 。


3. 加入梳打粉,同時要非常快手拌勻約20秒,焦糖梳打粉會先膨漲再會慢慢收縮,由於小鍋尚有餘温,加入梳打粉後顏色會稍爲深一點,緊接將焦糖液到在鋪上牛油紙的焗盤上/矽膠,待涼。
4. 焦糖冷卻後放入保鮮袋,用刀切至粒粒焦糖脆脆。

裝飾做法:


1. 砂糖加入忌廉打發。
2. 最後,蛋糕切半,在下半份蛋糕上抺上打發的忌廉,再蓋上另一塊蛋糕,再用忌廉抺好。

2014年3月28日 星期五

Lemon cupcake with lemon crub filling and creamcheese frosting 檸檬杯子蛋糕


材料:

檸檬杯子蛋糕(可做6個)
  • 牛油 65g
  • 砂糖 65g
  • 雞蛋 1隻
  • 低筋麵粉 65g
  • 泡打粉 1茶匙
  • 忌廉 2湯匙
  • 檸檬汁 1湯匙 
  • 檸檬皮 1個 
Lemon curd
  • 檸檬汁 1/4個
  • 雞蛋 半隻
  • 砂糖 25g
  • 牛油 25g
creamcheese frosting
  • cramcheese 90g
  • 牛油 60g
  • 糖粉 55g
  • 檸檬汁 10g
檸檬杯子蛋糕做法:


1. 先將檸檬汁加入忌廉中混合。
2. 在温室放軟牛油,牛油切粒,加入砂糖,用電動攪拌器打軟牛油至圖中的狀態,大約打5分鐘。
3. 加入雞蛋混合。
4. 加入檸檬忌廉及檸檬皮混合,一開始混合可能出現分離的現象,只要繼續打約2分鐘就可以混合好麵糊。
5. 加入過篩的麵粉及泡打粉 ,用刮刀輕力混合。
6. 平均放入紙模中,無須要抺平蛋糕面,麵糊在焗爐內會加熱變平。放入預熱175度的焗爐焗約25分鐘。

Lemon curd 做法:


1. 將所有材料放入小鍋中,一邊煮一邊攪,煮至稠身熄火。
2. 放涼放入唧袋,放雪櫃雪約15分鐘。
Cremcheese frosting 做法:

1. 將creamcheese 及牛油在室温放軟,用電動攪拌器打軟,約3分鐘。
2. 加入糖粉,先用刮刀混合,不要用電動攪拌器(會將糖粉打到四周),再用電動攪拌器打約1 分鐘。
3. 加入檸檬汁,用刮刀混合。

最後,將lemon curd 連咀插入蛋糕中間,唧入lemon curd,又或者可以先用小刀切走部分蛋糕再唧入lemon curd。在蛋糕上唧上creamcheese frosting 。

      2014年3月22日 星期六

      Raspberry chiffon cake 紅桑莓戚風蛋糕


      很久沒有做過戚風蛋糕,配上紅桑莓很特別,每一口蛋糕都是莓果的味道。

      5.5' 中空模(不要用不沾模)

      材料

      蛋黃麵糊
      • 蛋黃 3個 
      • 植物油 15ml
      • 低筋麵粉 60g (已篩)
      • 砂糖 35g
      • 紅桑莓茸 45g (我用的是急凍的果茸,可以用新鮮的榨汁)
      蛋白霜
      • 蛋白 3個
      • 砂糖 35g


      蛋黃麵糊
      1. 蛋黃,砂糖及油用打蛋器混合,不用打發到變白色,只須混合。
      2. 紅桑莓茸及低筋麵粉分兩次交錯加入蛋黃糊中混合 。

      蛋白霜
      1. 蛋白用電動攪拌器打至出現泡沫,砂糖分兩次加入打發,打至蛋白霜挺立。


      混合
      1. 預熱焗爐150度15分鐘。
      2. 將三分一的蛋白霜加入蛋黃麵糊,用輕力攪勻,用打圈再向中間劃的方法混合,再分兩次加入餘下的蛋白霜。
      3. 倒入戚風蛋糕模中,倒至6-7分滿,入焗爐前敲蛋糕模幾下,令麵糊中的較大的氣泡敲出。
      4. 入焗爐焗40 分鐘,出爐後馬上倒扣,待涼約2小時後用手沿著蛋糕模的邊脫模(用手掌肉沿蛋糕邊壓令蛋糕從模分開,內邊同樣重覆,底部向上推,最後只剩下蛋糕底部黏住模,同樣用手掌肉輕壓一圈,就可以成功脫模)。
      5.5' chiffon cake mold (Do not use non sticky mold)

      Ingredients

      Egg yolk mixture
      • egg yolk 3
      • vegetable oil 15ml
      • cake flour 60g (sifted)
      • sugar 35g
      • raspberry puree 45g (I used frozen puree but you could use fresh raspberries instead)
      Meringue
      • egg white 3
      • sugar 35g
      Egg yolk mixture directions:
      1. Mix egg yolk, sugar and oil. No need to beat it to fluffy and pale color, just mix and make sure sugar is dissolved.
      2. Add half of the raspberry puree and mix and then add half of the flour to mix again. Repeat the step until the mixture is smooth.  
      Meringue directions:
      1. Beat the egg white with an electronic mixer. Add half of the sugar when the egg white forms bubbles and beat, add the rest of the sugar and continue to process until the soft peak is reached.
      Combinations:
      1. Preheat the oven to 150 degree for 15 minutes. 
      2. Add one third of the meringue to the egg yolk mixture, fold the mixture gently until they are combined. Repeat the process until everything is well mixed.
      3. Pour it into the cake mold. Tap the mold gently on the working surface so that large bubbles are released.
      4. Bake for 40 minutes. Turn the cake upside down and let it cool around 2 hours. Use hand to remove the cake from the mold.

      2014年3月19日 星期三

      Green tea cake roll 綠茶卷


      近期上網計劃京都行程看到很多綠茶的甜點,又想到家中的綠茶粉,於是就做了這個綠茶卷。

      30 x 24 cm 烤盤

      改自小山進<好吃的西點蛋糕祕訣>

      材料:

      綠茶蛋糕體

      蛋黃 96g
      砂糖 12g
      蜂蜜 24ml
      綠茶粉 6g
      低筋麵粉 50g
      蛋白 128g
      砂糖 52g
      牛油 12g
      牛奶 28ml

      綠茶忌廉
      綠茶粉 5g
      忌廉 120ml
      砂糖 8g

      做法:


      綠茶蛋糕體
      1. 將蛋黃及12g砂糖混合,加入已加熱至40度的蜂蜜,打發至淺黃色。可以插一枝牙籤測試,如果可以挺立就OK。
      2. 將蛋白打發起泡,52g砂糖分三次加入,繼續打發至蛋白霜尾部下垂。
      3. 將一半的蛋白霜加入蛋黃糊中輕輕拌勻,再加入過篩的低筋麵粉,再將剩下的蛋白霜加入輕力混合。
      4. 綠茶粉加入牛奶混合,牛奶及牛油隔熱水加熱約80度。
      5. 加入綠茶牛奶及牛油拌勻。
      6. 倒入鋪上牛油紙的焗盤上,放入預熱180度的焗爐焗13分鐘。
      7. 取出,連同焗模一起在枱上放手一敲(離熱枱20cm 左右),撞出熱氣,連牛油紙取出蛋糕在涼架上放涼,撕去四邊的牛油紙。
      8. 待涼後,在蛋糕上蓋另一塊牛油紙,雙手拿住兩張牛油紙的頂部,反手反轉蛋糕,將底部的牛油紙撕去。
      綠茶忌廉
      1. 綠茶過篩,加入砂糖至忌廉打發。
      組合
      1. 先將忌廉在蛋糕上,其中一邊留約3cm 的空位作爲蛋糕的尾部。
      2. 用木棍的幫助下如捲壽司一樣捲起蛋糕。
      3. 放雪櫃一小時後享用。
      Ingredients:

      Green tea cake roll 

      egg yolk 96g
      sugar 12g
      honey 24ml
      green tea powder 6g
      cake flour 56g
      egg white 128g
      sugar 52g
      butter 12g
      milk 28ml

      Green tea cream 

      green tea powder 5g
      cream 120ml
      sugar 8g

      Direction:

      Green tea cake roll
      1. Mix egg yolk with 12g of sugar and whisk, add preheated to 40 degree honey slowly and continue to whisk until it becomes pale color. You could use a toothpick to test, it should be able to stand in the mixture. 
      2. Whisk egg white to bubble stage and then add 52g sugar (divided it into three times to add), whisk until soft peak stage and fluffy. 
      3. Add half of the meringue into the egg yolk mixture and fold in, and then add sifted cake flour and fold in until they are incorporated, next, add the remaining meringue and mix until incorporated. 
      4. Add green tea powder to the milk and mix. Heat up the green tea milk and butter to around 80 degree by bain marie method. 
      5. Add green tea milk and butter to the mixture and mix.
      6. Pour into the baking tray(with baking sheet), and put it into a preheated 180 degree oven for 13 minutes. 
      7. Take out the cake roll and tap the baking tray onto your working desk (above 20cm of your desk height) so that it could release the heat inside the cake roll. Move the cake roll from the baking tray and let it cool. 
      8. Put another baking sheet on top of the cake roll, use both hand to hold both sheets and turn the cake roll upside down so that you can remove the baking sheet originally sticking to the cake roll.
      Green tea cream
      1. Sifted green tea powder, add sugar and cream and whisk until firm peak. 
      Combination
      1. Whip the cream on top of the cake roll, leave around 3 cm width area without any cream at either of the edge of the cake roll and that side will be the end of the cake roll.
      2. With the help of the wooden stick, roll the cake roll like rolling the sushi roll.  
      3. Put it into the refrigerator for 1 hour.


      2014年3月2日 星期日

      Japanese strawberry shortcake 日式草莓蛋糕


      草莓蛋糕是日本人最喜愛的甜點之一,鬆軟的海棉蛋糕加上微甜的忌廉,配上草莓香甜,在家都吃到草莓蛋糕其實也算是一種幸福。

      材料:  (6"蛋糕模)

      出自小山進<好吃的西點蛋糕祕訣>

      海棉蛋糕

      • 雞蛋 130g
      • 砂糖 75g
      • 蜂蜜 7g
      • 水麥芽 7g (烘焙店有售)
      • 低筋麵粉 75g
      • 牛油 10g
      • 牛奶 17ml
      夾心草莓
      • 草苺 70g (約2大粒)
      • 糖粉 14g
      • 干邑/冧酒 2ml
      忌廉
      • 淡忌廉 250ml
      • 砂糖 15g
      草莓適量 作裝飾


      海棉蛋糕做法:

      1. 蜂蜜及水麥芽用隔熱水方式煮約40度。
      2. 雞蛋混合砂糖先打發一會,再加入蜂蜜及水麥芽繼續打發至厚稠。可以用牙籤測驗,如果插一枝牙籤,如果可以直立就可以。
      3. 低筋麵粉過篩,分兩次加入蛋糊中,輕力用刮刀拌混。
      4. 牛奶及牛油隔熱水約80度,加入至麵糊中,輕力拌混。
      5. 倒入鋪有牛油紙的蛋糕模中。
      6. 放入預熱170度的焗爐焗約30分鐘。
      7. 取出脫模,倒扣蛋糕放涼。


      夾心草莓做法:

      1. 草莓切片,用糖粉及酒混合。

      忌廉做法:

      1. 淡忌廉加砂糖打發至企身。


      組合:

      1. 蛋糕分兩份,用夾心草莓的汁掃在蛋糕上。
      2. 先鋪上一層忌廉,再放上草莓片,再鋪上一層忌廉。
      3. 最後用忌廉抺蛋糕表面。
      4. 再用草莓作裝飾。

      Ingredients:  (6"mold)

      Sponge cake

      • Egg 130g
      • Sugar 75g
      • Honey 7g
      • Glucose 7g (brought from bakery supply store)
      • Cake flour 75g
      • Butter 10g
      • Milk 17ml
      Strawberry filling
      • Strawberry 70g (around 2 big strawberries)
      • Icing sugar  14g
      • Cognac/ Rum 2ml
      Cream
      • Whipping cream 250ml
      • Sugar 15g
      Strawberries   a few for decoration

      Sponge cake directions:

      1. Heat honey and glucose to around 40 degree by water bath method. 
      2. Add sugar to egg and beat, add honey and glucose and continue to beat until fluffy. The mixture could be tested by a toothpick, if the toothpick can stand and does not fall, then it should be ok.  
      3. Sift the cake flour and add to the egg mixture and use a spatula to fold in and mix.  
      4. Heat milk and butter to around 80 degree by water bath method. Add to mixture and mix gently. 
      5. Pour into the mold. 
      6. Put that into the preheated 170 degree oven for 30 minutes. 
      7. Remove from the mold and put the cake upside down on the rack. 

      Strawberries filling directions:

      1. Cut the strawberries into slices and mix with icing sugar and the wine. 

      Cream directions:

      1. Add sugar to the cream and beat until fluffy. 

      Combination directions:

      1. Cut the cake into two halves, use juice from the strawberries filling and brush on the cake. 
      2. Cost a layer of cream on the cake and then put the strawberries filling and cover with another layer of cream. 
      3. Cover the cake with cream. 
      4. Use strawberries to decorate.